

A service framework of node gRPC.
fong是一个完全用typescript编写的node gRPC框架, 可以基于它很方便地编写gRPC微服务应用. 一般是用来编写service层应用, 以供bff层或前端层等调用.
1.纯typescript编写, typescript的好处不用多说了. 并且用户使用这个框架框架时, 查看定义都是ts源码, 用户使用框架感受不到type definition文件.
2.效仿egg.js的『约定优于配置』原则, 按照统一的约定进行应用开发, 项目风格一致, 开发模式简单, 上手速度极快. 如果用过egg, 就会发现一切都是那么熟悉.
目前能找到的开源node gRPC框架很少, 跟其中star稍微多点的mali简单对比一下:
| 对比方面 | mali | fong |
|---|---|---|
| 项目风格约定 | √ | |
| 定义查看跳转 | definition | 源代码 |
| 编写语言 | javascript | typescript |
| proto文件加载 | 仅能加载一个 | 按目录加载多个 |
| 代码生成 | √ | |
| 中间件 | √ | √ |
| 配置 | √ | |
| 日志 | √ | |
| controller加载 | √ | |
| service加载 | 即将支持, 目前可以自己import即可 | |
| util加载 | 即将支持, 目前可以自己import即可 | |
| 入参校验 | 即将支持 | |
| 插件机制 | 打算支持 | |
| 更多功能 | TBD |
github: https://github.com/xiaozhongliu/ts-rpc-seed
使用vscode的话直接进F5调试typescript.
或者:
npm startts-node tester
# 或者:
npm run tsc
node dist/tester.js不同类型文件只要按以下目录放到相应的文件夹即可自动加载.
root
├── proto
|  └── greeter.proto
├── config
|  ├── config.default.ts
|  ├── config.dev.ts
|  ├── config.test.ts
|  ├── config.stage.ts
|  └── config.prod.ts
├── midware
|  └── logger.ts
├── controller
|  └── greeter.ts
├── service
|  └── sample.ts
├── util
|  └── sample.ts
└── typings
|  ├── enum.ts
|  └── indexed.d.ts
├── log
|  ├── common.20190512.log
|  ├── common.20190513.log
|  ├── request.20190512.log
|  └── request.20190513.log
├── app
├── package.json
├── tsconfig.json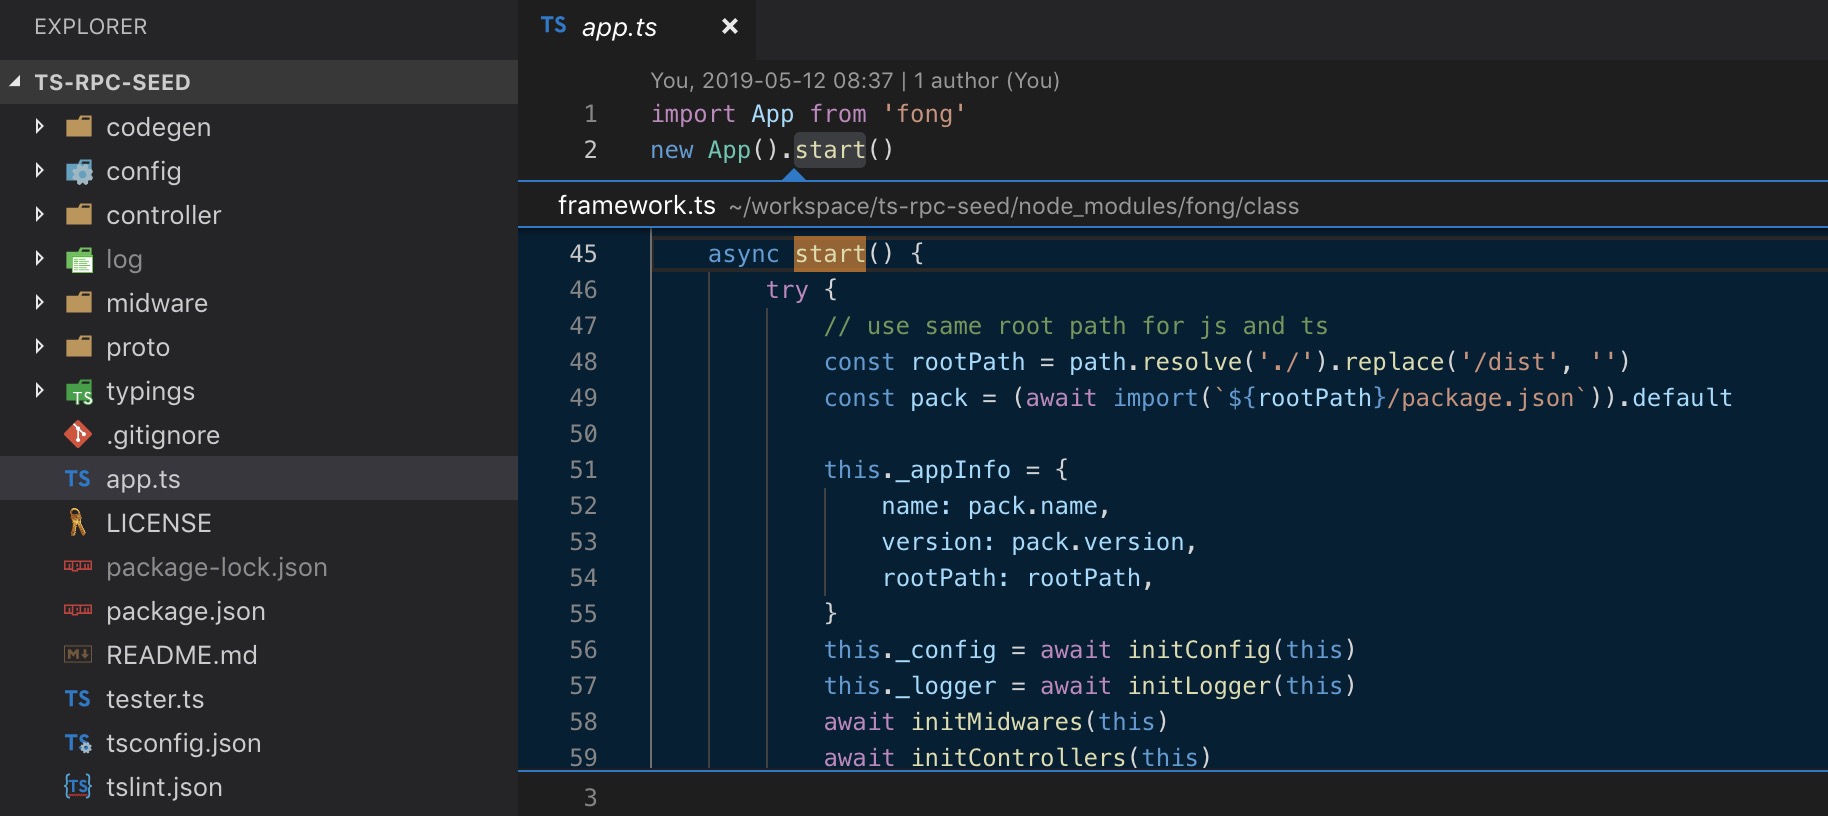
└── tslint.jsonimport App from 'fong'
new App().start()默认配置config.default.ts与环境配置config.<NODE_ENV>.ts是必须的, 运行时会合并.
配置可从ctx.config和app.config获取.
import { AppInfo, Config } from 'fong'

export default (appInfo: AppInfo): Config => {
    return {
        // basic
        PORT: 50051,

        // log
        COMMON_LOG_PATH: `${appInfo.rootPath}/log/common`,
        REQUEST_LOG_PATH: `${appInfo.rootPath}/log/request`,
    }
}注: req没有放到ctx, 是为了方便在controller中支持强类型.
import { Context } from 'fong'
import 'dayjs/locale/zh-cn'
import dayjs from 'dayjs'
dayjs.locale('zh-cn')

export default async (ctx: Context, req: object, next: Function) => {
    const start = dayjs()
    await next()
    const end = dayjs()

    ctx.logger.request({
        '@duration': end.diff(start, 'millisecond'),
        controller: `${ctx.controller}.${ctx.action}`,
        metedata: JSON.stringify(ctx.metadata),
        request: JSON.stringify(req),
        response: JSON.stringify(ctx.response),
    })
}import { Controller, Context } from 'fong'
import HelloReply from '../typings/greeter/HelloReply'
export default class GreeterController extends Controller {
async sayHello(ctx: Context, req: HelloRequest): Promise<HelloReply> {
return new HelloReply(
`Hello ${req.name}`,
)
}
async sayGoodbye(ctx: Context, req: HelloRequest): Promise<HelloReply> {
return new HelloReply(
`Goodbye ${req.name}`,
)
}
}日志文件:
请求日志: ./log/request.<yyyyMMdd>.log
其他日志: ./log/common.<yyyyMMdd>.log
请求日志示例:
{
    "@env": "dev",
    "@region": "unknown",
    "@timestamp": "2019-05-12T22:23:53.181Z",
    "@duration": 5,
    "controller": "Greeter.sayHello",
    "metedata": "{\"user-agent\":\"grpc-node/1.20.3 grpc-c/7.0.0 (osx; chttp2; godric)\"}",
    "request": "{\"name\":\"world\"}",
    "response": "{\"message\":\"Hello world\"}"
}代码生成器还未单独封包, 现在放在示例应用的codegen目录下.
使用方法:
1.定义好契约proto, 确保格式化了内容.
2.运行代码生成逻辑:
ts-node codegen这样就会生成controller及相关请求/响应的interface/class, 未来会支持更多类型的文件的生成.
3.从./codegen/dist目录将生成的controller文件移入./controller文件夹并开始编写方法内部逻辑.
Peek Definition直接指向源码.

service文件放到service文件夹即可自动加载. 通过ctx.<service>使用.
util文件放到util文件夹即可自动加载. 通过ctx.util.<function>使用.
把在这里用的参数校验中间件搬过来, 用class-validator和class-transformer实现校验, 支持自动生成.
应用内的request model将会类似:
import { IsOptional, Length, Min, Max, IsBoolean } from 'class-validator'

export default class IndexRequest {
    @Length(4, 8)
    @IsOptional()
    foo: string

    @Min(5)
    @Max(10)
    @IsOptional()
    bar: number

    @IsBoolean()
    @IsOptional()
    baz: boolean
}
框架内的validate midware将会类似:
import { Context } from 'egg'
import { validate } from 'class-validator'
import { plainToClass } from 'class-transformer'

import HomeIndexRequest from '../request/home/IndexRequest'
import HomeValidateRequest from '../request/home/ValidateRequest'
const typeMap = new Map([
    ['Home.index', HomeIndexRequest],
    ['Home.validate', HomeValidateRequest],
])

export default async (ctx: Context, next: Function) => {
    const type = typeMap.get(ctx.routerName)
    const target = plainToClass(type, ctx.query)
    const errors = await validate(target)

    if (!errors.length) return next()

    ctx.body = {
        success: false,
        message: errors.map(error => ({
            field: error.property,
            prompt: error.constraints,
        })),
    }
}
https://github.com/xiaozhongliu/fong